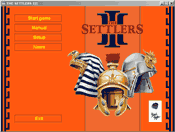
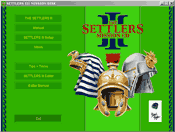
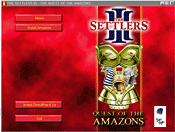
In this chapter you'll learn more about the menu system, which you'll use when preparing a game. If you have any difficulties navigating through the menus, this is the place where you can find help.
As soon as you insert one of the SETTLERS III CDs in your CD-ROM drive, the game will start automatically with the start menu after loading unless you've disabled the autostart function.
Depending on whether you've inserted the original game CD, the Mission CD or the Amazon CD, the start screen will be different.
|
|
|
If you start the game from your Windows start menu or begin play direct from the installation, the start menu of the original game CD will appear.
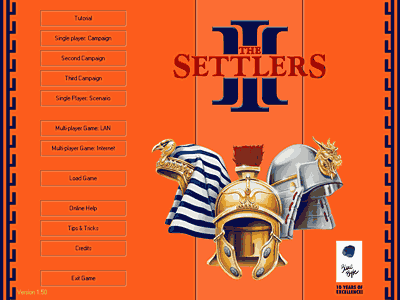
This button brings you to the main screen where you can choose from a variety of different types of game to play. This main menu screen will also look different depending on which version of THE SETTLERS III you own and have installed.
The Main Screen
This button brings you to this manual.
This button brings you to a menu where, depending on the configuration of your hardware, you can make adjustments to optimize the performance of your computer.
In the upper area of the screen you'll find various processor speeds displayed from left to right. When you click on the processor speed corresponding to your computer, values will be automatically be determined depending on your processor speed. Because the processor speed is not the only factor that influences the speed of your computer, you are free to make any changes you feel might improve performance. Please keep in mind that enabling advanced features can decrease performance dramatically. Below the list of processor speeds you'll find four tabs labeled "Speed", "Game Controls", "Sound" and "Troubleshooting". By clicking on one of the tabs, you'll enter the corresponding dialogue box.
THE SETTLERS III offers you three screen resolutions: 1024x768, 800x600, and 640x480. Normally the lower the resolution is set, the smoother the display is.
Here you can choose between alpha channel shadows and normal shadows. Alpha channel shadows are transparent and require more processor time but look better.
Here you can adjust how soft the transition is between the parts of the map which are visible and those which are covered by the fog of war. The softer the setting you choose, the slower your computer will become.
Here you can decrease monitor flimmer. Synchronized screen display will increase demands on your processor and may decrease performance.
Here you can decide whether you want to move the visible part of the playing area with the right mouse button depressed, or to have it scroll it automatically when the pointer reaches the edge of the screen. The choice is up to you.
Here you can adjust the scroll speed. This is also a matter of personal preference and is influenced by system performance.
Here you can adjust whether buildings which you have selected to construct are displayed on-screen only as small dots or additionally with darkened symbols of the building. This again is a matter of personal taste.
During the game you'll get a variety of messages informing you, for example, about mineral deposits discovered, various military events, problems with your economy or perhaps even that an urgently needed transport ship is finally available.
![]()
![]()
![]() You can adjust which messages you need, or want to receive, with the
"Message Level" bar. An experienced player doesn't have to be informed everytime
the geologist has discovered iron or gold somewhere, nor does he need suggestions about
the best place to build a mine. For the beginner, however, this is important information.
You can adjust which messages you need, or want to receive, with the
"Message Level" bar. An experienced player doesn't have to be informed everytime
the geologist has discovered iron or gold somewhere, nor does he need suggestions about
the best place to build a mine. For the beginner, however, this is important information.
Below is a sample list of the type of messages you might receive. Although this isn't a complete list of all the messages that you could receive, it can serve as orientation for deciding which message level you prefer and need.
9 |
One of your buildings is
under attack You are under attack You are losing land One of your ships is under attack A building isn't occupied because no Settler is available A building isn't occupied because no tool is available You have lost a building You have taken over a building One of your ships has been sunk There are no more minerals for this mine Your catapult is ready There are no more trees in your woodcutter's working area Your merchant ship is ready Your ammo is ready An ally is taking over territory Your geologist has discovered coal / iron / gold / etc. |
Here you can reduce the quality of the sound to eliminate possible graphics performance problems. The more processor capacity is used for the sound, the slower the graphics become.
During the game you can listen to music from the game CD. You can adjust whether you prefer to listen to music composed specially for the race you are playing or to all the tracks available on the CD.
The animation sequences on the game CD are available in two resolutions. For Pentium II machines with a processor speed of 266 MHz or better, we recommend playing the film animation in the higher resolution of 640 x 480. For all systems with lower performance processors please use the normal 320x200 resolution.
Here you can decide whether you want to watch the introductory animation at the beginning of the game or not.
During the testing phase, there were conflicts on some systems with color mouse pointers. If you experience unexplainable system crashes or have other problems and use a color mouse pointer, try replacing your color mouse pointer with a normal black-white standard mouse pointer.
This button allows you to save your personal settings so that you don't have to readjust them anew every time you start a game.
This button leads you to information, videos and demos of other Blue Byte products. Be sure to check it out!
Tips &
Tricks (Mission CD / Amazon CD)
![]()
This button takes you to the section with Tips & Tricks collected in diverse SETTLERS III forums and from our hotline. Here you'll also find information about new features added in the Mission CD.
SETTLERS
III Level Editor (Mission CD / Amazon CD)
![]()
This button takes you to the map editor which allows you to create your own Settler worlds.
Level Editor Manual (Mission CD / Amazon
CD)
![]()
This button takes you to manual for the map editor. Here you'll find a load of information about how to use the map editor to design great SETTLER III maps.
This button will return you to your Windows desktop.
The tutorial mission initiates you into the fundamentals of the game and familiarizes you a little with navigating in the SETTLERS III world and building up a functioning economy. An in-depth familiarity with the game comes gradually with increasing experience and playing against others on the net.
The campaigns are a preset series of missions which unfold within the story of the Settlers and their respective gods. When you press the "Single Player: Campaign" button, you'll first witness the introduction — an animated film that begins the wonderful tale in THE SETTLERS III.
If you have the Amazon CD, the game gives you the choice between two campaigns. In the first campaign you are in the service of Q'nqüra and the Amazon queen, Penthesilea, whom she has chosen. In the second campaign you serve as representative of one of the three gods, Jupiter, Horus, or Ch'ih-Yu. Keep in mind that they are very reluctant to be disturbed while they are feasting.
Jupiter has chosen a merchant ship-captain named Septimus Marius to represent the Romans. Septimus is an old sea dog, combining intelligence with the cleverness of a trader, and, when necessary, iron-fisted resolve. He's well-versed in economic and military matters.
As a Roman, he needs stone and boards in approximately equal proportions for building. He also has it a little better than his competitors in a couple other areas as well: For the wine production in a Roman colony, only one building is necessary and if there is a scarcity of coal, his charcoal maker can transform boards into charcoal.
He also has weaknesses: his instrument of war, for example, is the catapult which functions in an imprecise manner.
Horus has selected Ramadamses to lead the Egyptians. Ramadamses' experience as a sculptor has given him a wealth of knowledge and experience in trading; he has become quite shrewd in his dealings. He is strong in matters that concern the economy.
He can make good use of these abilities to get the Egyptian economy in full swing. The Egyptians need much more stone than wood for their buildings. He can't afford to make too many mistakes while building up the Egyptian economy because stone resources are non-renewable. Egyptian buildings also take up more space because Ramadamses tends to prefer spacious ornate architecture.
For producing beer, Ramadamses needs a grain farm, a waterworks and a brewery whereas Septimus can get by with just one building for producing wine.
In order to motivate his people to enter into battle with the necessary courage, he has to find, instead of gold, the much rarer deposits of gems. Each basket of gems that he finds, however, gives his soldiers twice as much motivation as a basket of gold gives the soldiers of the competing races. Egyptian interest in gold is such that Egyptian soldiers only fight with half as much motivation for every basket as their counterparts of the other races.
The Egyptian instrument of war, the ballista, is even more inaccurate than the Roman catapult.
Beginners are well advised to gain some solid experience before playing the Egyptians. This race requires a great deal of game skill and accuracy.
Ch'ih-Yu has chosen Tsu-Tang to lead the Asians. While a farmer by trade, Tsu-Tang is also a powerful warrior. Forced to give up his trade and learn the art of war, Tsu Tang has the strength and willpower of a man protecting his homeland. He possesses great strengths in the art of war. As an Asian, he prefers light construction design with an abundance of wood and little stone. This can cause difficulties at first, but Tsu-Tang is well aware that he must first build up a large production site for satisfying his colony's great need for wood. Only then can he turn his attention to the other needs of his colony.
To compensate for his initial difficulties, Tsu-Tang does have some advantages. He is able to mine sulfur and use it for extremely explosive purposes. His cannons are very accurate and effective. Whereas an entire load of stones as ammunition often isn't enough for the Romans to destroy a single small tower, no more than two cannon balls are normally required to leave a small tower in ruins.
Because of the additional building difficulties for the Asians at the beginning of every mission, Tsu-Tang, as a wise man, would recommend playing the Asians after gaining some experience with playing the Romans.
After you've decided on one of the three races, a briefing screen will automatically appear and will give you details concerning your first mission.
2. Campaign
(Mission CD)
![]()
The second campaign relates to a wager that the gods have made about regarding getting enough food, drink and other goodies from their races as sacrifice as quickly as possible in order to adorn the banquet tables in the Pantheon in a manner fitting for the gods they are. Again, as usual with the gods, the exact details are not so clear; these gods work in mysterious ways.
3. Campaign
(Amazon CD)
![]()
Q'nqüra, the red-headed nemesis of our three gods, hasn't just blown in from nowhere. Her ancestry, her role as god of the Amazons and her promotion to HIS executive secretary is narrated during the third campaign.
Q'nqüra has selected Penthesilea, the step-daughter of the Trojan ruler, Priamos, as leader of her race. Penthesilea is, of course, a soul mate and Homer tells us that it took no less than Achilles to defeat her. The three male gods are going to be hard-pressed to come up with an Achilles...
Three against one - and the one is female at that. That doesn't sound fair. Without strong support from you, however, the three gods are going to find this matter unpleasantly one-sided. Q'nqüra and her model of female strength and cunning, Penthesilea, can only be defeated with a great deal of difficulty.
After you've decided on one of the races, a briefing screen will automatically appear and will give you details concerning your first mission.
To begin with, you have to choose a map on which your game will take place. In the middle section of the menu you'll be given the option of choosing between four types of maps: random, single player, multiplayer and user maps.
When creating a random map, you have a number of possibilities to choose from. On the right-hand side of the screen you'll find the corresponding buttons for doing this. First, you‘ll need to choose the size of the map you want to play. Available map sizes range from 384x384 to 768x768. You can also have the map mirrored either along its short, long, or both axes. After you've made your selections, you can confirm them by pressing "OK".
If you click on the "Single Player" button, you'll see a list of different maps with information about their size and the maximum number of players. "640-12.MAP" means that the map is 640 by 640 in size and is suitable for 12 players. If you click on one of these maps, you'll be able see a top-down overview of the selected terrain. Once satisfied with your choice, confirm it by pressing "OK".
If you click on the "Multiplayer" button, you'll see a list of different maps which are actually made for multiplayer games but which can also be played as single player maps when the computer takes over the roles of your opponents. If you click on one of these maps, you'll be able see a top-down overview of the selected terrain. If you're satisfied with the map, confirm this by pressing "OK".
If you've created and exported your own single player maps with the map editor, they'll also be available in this selection. You'll have to have the SETTLERS III Mission CD or Amazon CD for this.
You‘re now ready to begin play.
After you've clicked on the "Multiplayer Game: LAN" button, you‘ll come to the multiplayer lobby screen where you can meet other players. Here you can log into available games and link-up with fellow players.
The "Type of Network” window shows all of the available network connections that have been detected by the game. Depending on the type of connection you choose, you'll have to provide the appropriate information. The type of connection will appear in bold print. If one of the following windows isn't displayed, your connection doesn't require this information.
Here you'll find the name you entered when you first logged into Settlers III Online. If you‘re playing for the first time, or haven't played online yet, you can enter the name which you wish to use when playing. This may be changed later if you wish.
If this window appears, you‘ll need your computer‘s IP address. You can find your IP by choosing "Run" from the Windows start menu, and entering "winipcfg.exe". If your computer reports that it can't find this file, then go to "Find - Files or Folders" and search your local hard drives for the file "winicpfg.exe". When you've found it, double click on it. A box will pop up in which you'll find the IP address of your computer. Enter this number in the corresponding window of the menu.
When you press the "Search for Games" button, the program begins searching for games on the network. Beforehand, you have to have entered a type of network. These games, along with a listing of all the players who have already joined, will be displayed in the "Game" and "Players" windows.
When you press the "Join Game" button, you are attempting to join the selected game. If you're successful, you'll be placed into a open slot within the game. You'll find additional information about this in the section, “Meeting Place”.
When you press the "New Game" button, you can create your own game for others to join. More information about this process can be obtained within the section "Create a Game".
If you decide that you don't want to join in any of the multiplayer games offered on the LAN, you can press the "Back" button. You'll then return to the start screen.
The first time you dial into Settlers III Online, the program will ask you for your serial number. This is a 20-digit number in five blocks of four digits which you'll find printed on the back of CD cover inlay from the original SETTLERS III CD.
IMPORTANT: PLEASE DO NOT LOSE THIS NUMBER. IF, FOR WHATEVER REASONS, YOU HAVE TO REINSTALL THE SETTLERS III AND YOU NO LONGER HAVE THE NUMBER; WE CANNOT HELP YOU:
After entering your serial number, you have to enter a name under which you want to play and a password. The name you enter can be your own or a pseudonym. You can also create multiple game identities, for example, "Romulus" for playing the Romans, "Cheops" for playing the Egyptians and "Tai Won Ahn" for the Asians. To create a new identity, you have to press the "Create Player" button and then enter the new name you want to create and a password.
If you're already a member of a clan, you can press the "Clan" button here so that you're identified as a clan member. If you don't do this, the option of playing a clan ladder game won't be activated.
You can now log into Settlers III Online by pressing the "Log In" button. If you decide that you'd rather not play online, you can press the "Back" button.
After logging in, you'll find yourself in the "Home" area of the Lobby. From the "Home" area of the Lobby you can enter any of the three other Zones by clicking on the corresponding buttons on the left-hand side of the screen. These are the ChatZone, the GameZone and the MessageZone. The "Log Out" button returns you to the start screen where you can return to Windows.
This is the first page which appears after you log in. Besides some recent game information, it contains statistics on the number of people worldwide who are currently logged in, have logged in the last hour, and were logged in the previous day.
In the ChatZone you can exchange messages with other players. Public as well as private chat groups can be found here. In a chat group you can exchange messages with the other people who are also in this chat group. You can also create games from this area by pressing the "Create game" button in the lower right-hand corner of the screen. Games created from the ChatZone are displayed in the upper area of the screen to everybody in the chat group. You can join any of the games listed by clicking on the name of the game. You can get additional information about how to proceed in the section "The Meeting Place".
Public chats are open to everyone and are not restricted to any particular subject. For your convenience, several public chat groups have been created for you, the "Meeting Room", where you can arrange a game, subject-oriented rooms (for example, for beginners) and language-oriented rooms.
You can create your own private chat groups by clicking on the "Create group" button in the lower right-hand corner of your screen. You'll be asked to give the group a name and you'll also have the option of entering a short description of the group‘s identity.
It's also possible to give the chat group password protection. This will give you control over who participates in the group. If you give the group a password, make sure that everyone you want to have in the group also obtains the password.
In the GameZone you can join in a newly created game as long as the game has one player slot still available. You can see whether any places are still free by looking to the right of the name of the game. Here you'll see a fraction, 4/8, for example. This would mean that four of eight slots are already filled, 8/8 would mean that all available slots are already filled, but that the game hasn't started yet. These games will be displayed in red. Click on the game you want to join; if no games are available, a corresponding message will appear.
You can also make adjustments in the GameZone regarding the types of games that are displayed. Above the game display you'll find a row of buttons which can be toggled to show the types of games that are available to join. By default, all these buttons are activated. If you're not interested in a certain type of game, you can deactivate it by clicking on the corresponding icon. After doing so, this type of game will no longer be displayed.
From left to right the meaning of the buttons are: ranking lists games, free-for-all, one vs. one, two vs. two, three or four vs. three or four, five or more vs. five or more, three teams, team vs. computer, other groupings, select all types, select none.
In order to join a game you only have to click on the name of the game you want to join.
Please read the chapter: Creating a Game.
In the MessageZone you'll find all kinds of news and information on updates. In the upper left-hand corner of the screen you can see what subjects are presented. Click on the subject you are interested in. In some cases there'll be more than one message dealing with a particular subject. For this reason there are three additional buttons, "Previous", "Next" and "Newest". With these buttons you can navigate through the different messages on any given subject.
This button returns you to the start screen and breaks your connection to The Settlers III Online.
Saved games from the campaigns and single player games can be loaded by pressing this button.
This button brings you to this html manual.
Here you can find out who was involved in bringing you THE SETTLERS III.
This button makes your Settler population very sad. It should be used very sparingly.
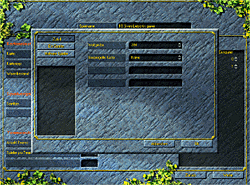 When you play THE SETTLERS III on a
local area network or on the Internet, you'll come into a menu where you can make all the
necessary adjustments for preparing a game. In the upper part of the menu you'll find the
name of the game you are creating. The default name will be [Your Name]‘s game. You
can, of course, choose other names for games that you create.
First you have to choose a map where your game will take place. In the menu which you'll find in the middle of your screen, you can choose between three types of maps: random maps and multiplayer maps and user maps. You can also load multiplayer games you've saved here.
You have a variety of choices in making a random map. You'll find several buttons on the right-hand side of the screen to help you make these choices. First you have to choose the size of the map. The possible sizes range from 384x384 to 768x768. Next you can choose whether the map is to be mirrored. You can mirror the map either along its short axis, its long axis or both. After you've made all your choices, confirm these by pressing “OK“ .
When you click on the “Multiplayer” button, you'll see a list of different maps with information about their sizes and the maximum number of players for which they are suitable. “640-12.MAP” means that the map has a size of 640x640 and is suitable for up to 12 players. When you click on one of these maps, you‘ll see a top-down overview of the terrain you've chosen on the right. When you're satisfied with your choice, click on the “OK” button. If you change your mind and want to play on a map someone else has created, click on the “Cancel” button.
User Maps (Mission CD /
Amazon CD)
![]()
If you've created your own single player maps with the map editor, these will automatically be copied to the appropriate folder so that they appear here. For this you need the SETTLERS III Mission CD and you must have exported the maps to the game.
Saved Multiplayer
Games (Mission CD / Amazon CD)
![]()
If you've already played some games on the net and have saved incomplete games, you can start these from here.
After you've selected a map, an additional menu will appear where you can make more detailed adjustments to the map you've chosen.
Under "Map Settings" you'll find the buttons, "Map", "Map Type" and "Goods".
Next to the "Map" button, you'll see the name of the map you have chosen. To the right there is a "playing area" button which you can use to return to the previous window if you decide you'd prefer a different map than the one you've already chosen.
Next to the "Map Type" button, you can see more information on what type of map you've selected. In most cases the map you've chosen will be identified as a map but it could also be identified as a scenario.
Next to the "Goods" button, you can adjust how many goods are available to you and your opponent(s) at the beginning of the game. You can either choose the default value (unknown to you) or a small, medium or large number of goods to begin with.
Under "Common Team Setups" you'll find the "Game Type" button.
The "Game Type" button lets you further decide what kind of game you want to play. The various options include "Map defaults", "No teams", or "Teams". Depending on which of these options you choose, further adjustments can be made in the fly down menu directly below. With "Map Defaults", you'll have various options which differ considerably from map to map. If you choose to play "No Teams", you'll have the option of playing a League, Free-for-All, Free Alliance or Play Alone game. If you choose to play "Teams", you have the option of playing 2 vs.2, 3 vs.3, 4 vs.4, 2 vs.2 vs.2 or other. Random maps have no default values with regard to the type of game. In this case you have to set them by hand.
Note: You'll find as you experiment with the settings that when you change settings under one of the broad areas "Common Team Setups", for example, that changes will automatically be effected under the other areas "Team Settings: General" and "Team Settings: Specific". These settings are interrelated. The program will make sure that the settings that you choose are consistent with one another.
Under "Team Settings: General" you'll find the buttons "Number of Teams", "Players per Team" and "Computer Opponents per Team".
The three fly down menus next to these buttons allow you to precisely control the settings for these categories.
Under "Team Settings:Specific" you'll find at the top two categories, "Players" and "Computers". The button on the right with the Roman numbers show which teams the human players and computer players belong to. You can then make fine adjustments which allow teams of different sizes. With the arrow buttons to the right of the team number you can enter exactly how many players belong to each team. There are limits to the number of players who can play on each team depending on the absolute number of players for the game as a whole. This allows a very precise definition of team settings.
In the middle of the same window you'll see the word "Timeout" with a number of seconds to the right. This allows you to set the time that one of the players can be absent on account of Internet connection problems before this player is replaced by a computer opponent.
At the very bottom of this window you'll find either four or five buttons, depending on whether you've logged in as a clan member or not. These are the "Amazons", "Normal Game", Economic Mode", "Ladder: 1 on 1" and (if you are logged in as a clan member) the "Ladder: Clans" buttons.
The "Amazon" button allows you to choose whether the Amazons as a race are enabled in the game. If the Amazons are enabled, only those players who also have the Amazon CD will be able to join in this game.
The "Normal Game" button allows you to play a game that isn't evaluated for the world ranking lists.
The button "Economic Mode" allows you to create a game which focuses less on military power and more on achieving economic goals. The fighting strength of your soldiers outside your borders is set so low in this mode that military attacks aren't worthwhile. You'll have to find out for yourself how your soldiers protect hordes of thieves in neutral territory returning home with their booty.
In this mode, a short mission briefing, for example, "Store 250 bars of gold, produce 60 swords and build four large residences" will be displayed. You can also refer to economic goals during the game by clicking on the computer icon in the bottom left-hand corner of the control center and then on "Economic Mode". A list of goods with numbers next to them will appear. These are the economic goals you have to accomplish.
The buttons "Ranking List: 1 on 1" and "Ranking List: Clan" enable games which are evaluated on an international basis and used to establish the world ranking lists. You can get more information on how to join or even form your own clan as well as on how to participate in ranking list games at our website at www.settlers3.com or by pressing the "News" button in the main menu.
After you've completed all your adjustments, click on the "OK" button.
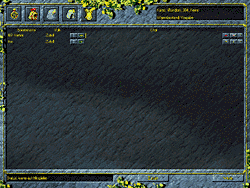 After you've created a game or have joined a
game, the "Meeting Place" menu appears. Here you may have to wait a while until
enough other players join the game to fill all the available slots. In the upper left of
the window you'll see either four or five buttons, depending on whether you've activated
the "Amazons" button in the preceding window. With these you can choose which
race you want to play. The three or four helmets represent each of the three or four races
available and the wheel of fortune to the far left chooses a race at random from those
available. This is the default setting, so if you want to play the Egyptians, for example,
you have to click on the Egyptian helmet. To the right of your name you can see which race
you have selected.
Farther to the right you'll see a LED which can vary from green to yellow to red. Green indicates a good Internet connection, red indicates a poorer connection which can cause serious lag or even a complete disconnection in extreme cases. If the connection is very poor, you should try logging in anew.
To the right of this LED is the chart window. If you click in the empty space next to the LED, a cursor will appear. You can use this line for chatting, for sending off a couple messages, or perhaps even for challenging your opponent.
To the right of the chatline you'll find a smaller red LED. This is the ready button. By clicking on this button, players can toggle between ready and not-ready modes. Only after all the players have clicked on this lamp making it green, can the game begin. A bit farther to the right you'll find another small button called the kick button, which can be used to remove players you don’t want to have in the game. When you're satisfied with the players and everyone has clicked their ready button to green, the game can begin.
